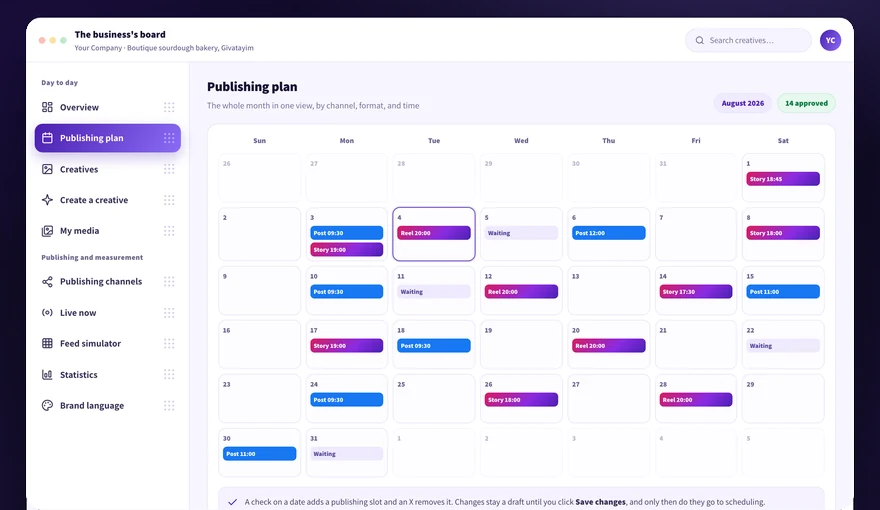
The Content plan is a calendar that shows which dates are publishing dates and what goes out on each one. Here you learn how to read the calendar, how to add or remove a publishing date, how to set the frequency and the publish time, and how to spot what is still waiting for your approval.
We didn't find an answer for that search. Try another word, or ask the bot below.
The Content plan is a calendar of the month, and every publishing date lays out all four formats: Instagram post, reel, story, and Facebook post. Each format has its own color, and clicking a day shows everything planned for it.
1
Sign in to the system and choose Content plan in the menu.
2
Look at the current month and see which dates are marked as publishing dates.
3
Click a day and see the creatives planned for it and their source.
4
Identify by color which format each item belongs to: Instagram post, reel, story, or Facebook post.
5
Filter by status to see only days that were published or only days that are waiting.
Published is set only by a real confirmation coming back from Meta, not by what was planned.
On the monthly calendar you mark which dates are publishing dates. A check mark adds a date, an X removes one, and the changes stay a draft until you click save changes.
1
Open the Content plan and find the month you want to change.
2
Mark a check on a date to add it as a publishing date.
3
Mark an X on a date to remove it from the plan.
4
Click save changes. Until that click nothing reaches the scheduling system.
5
After saving, check that the dates marked on the calendar are the ones you wanted.
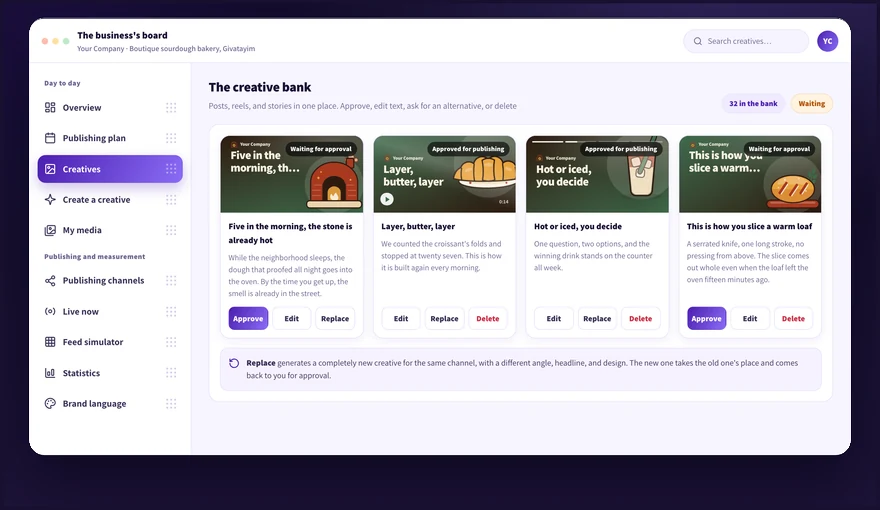
There is no dragging of a single item from date to date. What you set on the calendar is which dates are publishing dates, and which item goes out on each date is decided by the approval order in the Creative bank.
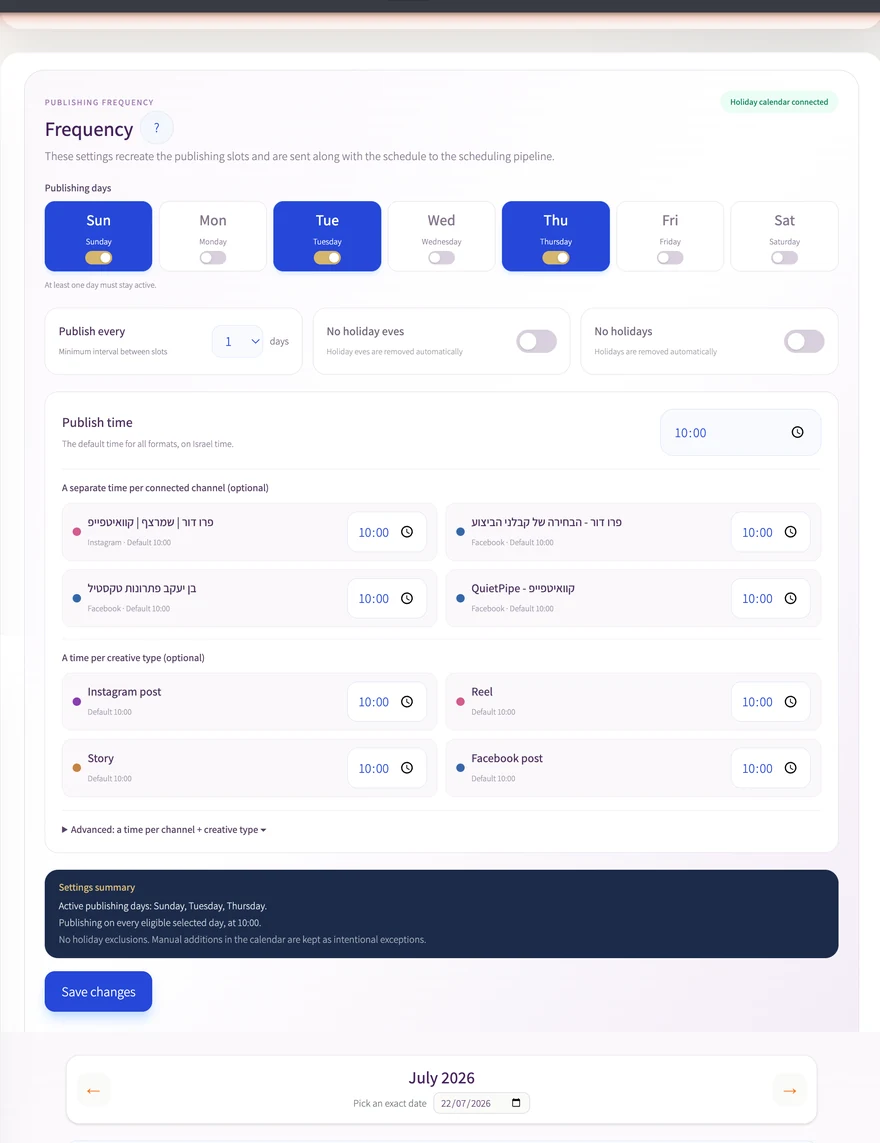
In the frequency settings you set which days to publish on, the minimum gap between dates, and whether to skip holidays and holiday eves. The publish time is set at four levels of precision: a general time, a time per connected channel, a time per creative type, and in advanced mode a time for an exact channel and type combination. The most specific level always wins.
1
Open frequency and calendar and the frequency settings open: toggles for weekdays, a minimum gap in days, and holiday exclusion.
2
The general default time applies to every publication that has no more specific setting.
3
Below it you can set a separate time for each connected channel (for example Instagram at 10:00 and Facebook at 19:00), and for each creative type (post, reel, story).
4
In advanced mode you set a time for a specific combination, for example a reel on Instagram specifically at 17:30. The specific setting overrides the general ones.
5
A one-off time for a specific day is set from the calendar itself, by clicking the date.
The publish time is one setting for the whole plan, not a separate time per item.
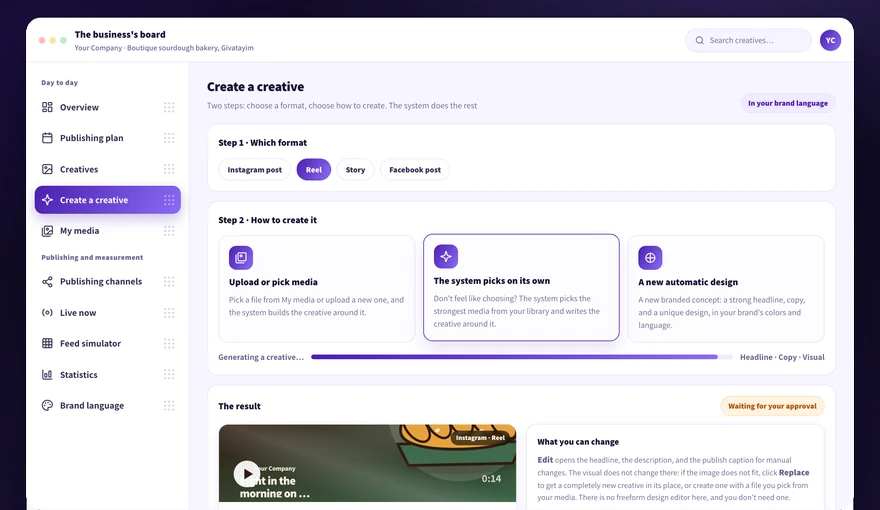
An item is born on the Create creative screen and saved in the bank. The moment you approve it, it enters the live queue, and on each publishing date the next approved creative of each format is picked.
1
Open the Create creative screen and choose the item type.
2
Choose a creation method out of three, and wait for the result.
3
Review the text and the visual, request an alternative or edit as needed.
4
Approve the item. The approval order is what sets the publishing order.
5
Open the Content plan and see it slotted into the nearest date for its type.
There is no manual scheduling of an item to a specific date. What moves an item forward or backward is its approval order in the bank.
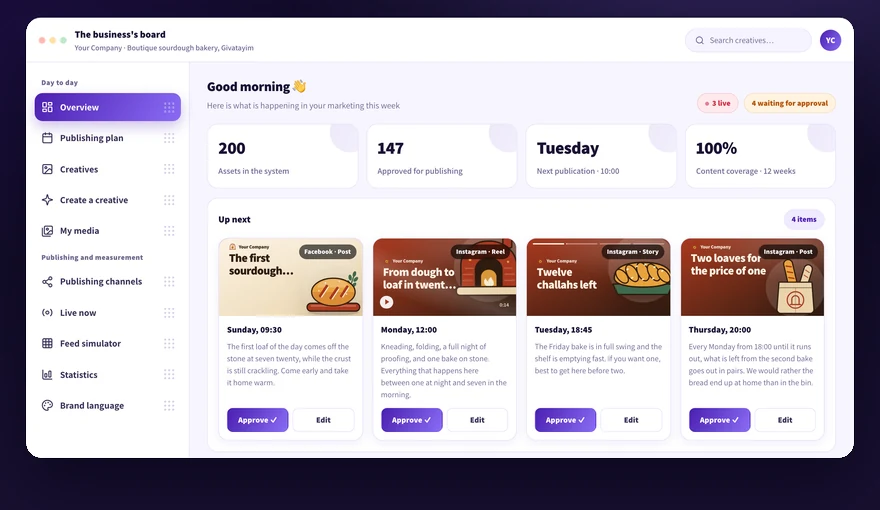
In the Content plan every item that has not been approved yet is marked separately, so you can see at a glance which dates are waiting for you. The approval itself happens on the Overview screen and is explained in the article How to approve an item waiting to publish.
1
Open the Content plan and look at the current month.
2
Find the items on the calendar carrying the pending approval mark.
3
Read on each marked item which date and which format it is planned for.
4
Note for yourself which dates are still waiting for you and which are already settled.
5
Move to the Overview screen to do the approval itself.
The calendar shows what is waiting. The approval process itself is explained in the article How to approve an item waiting to publish in the Approval and publishing category.
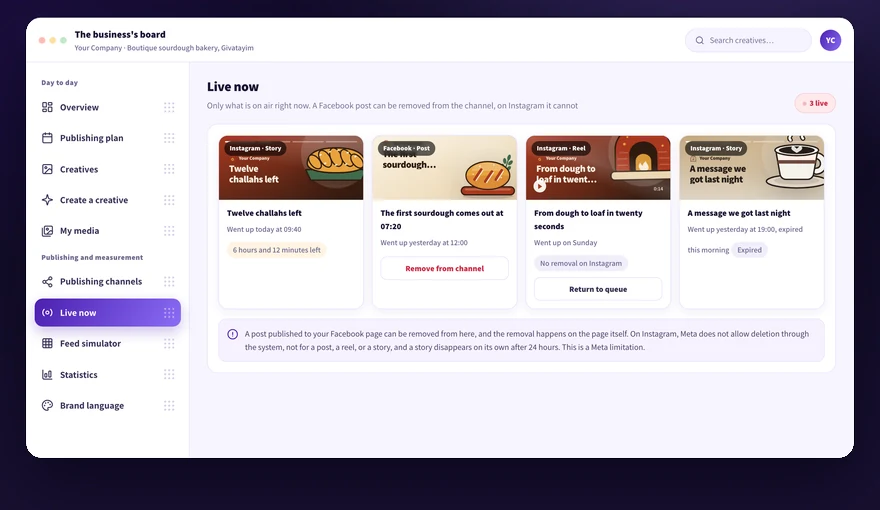
A slotted item can be deleted or replaced with another approved creative, and the system slots the next approved creative of the same type in its place. An item that already went live is handled on the Live now screen.
1
Open the Content plan and click the day the item is slotted on.
2
Choose delete to remove it, and the next approved creative of the same type takes its place.
3
Choose replace to slot another approved creative from the bank in its place.
4
Move to the Live now screen if the item already went live.
5
Remove a Facebook post directly from the channel through that same screen.
Instagram content, whether a post, a reel, or a story, is not deleted through the system. Removal is done from the Instagram app, and a story comes down on its own after 24 hours.
Didn't find it? Ask us
The bot knows the whole help center. If it doesn't know, it hands you over to us with a summary of what you already tried.